Sunday 17 November 2013

Stockings hung by the chimney with care...


...well we don't actually have a chimney, mores the pity! But we do have stockings. This Christmas is the first my FiancĂ© and I will have lived together and I always knew I would go a bit overboard with the Christmas making and decorating but stockings were a must. We went together and chose fabric which makes it even more special, I have very specific taste but I didn't want to be all about me! And as it turns out, even the fabrics I wasn't too sure about in the shop look lovely all together here :)
 
I made a template and quilted the strips together before cutting out the shape, they're lined with more polka dots and of course trimmed with bobble trim which we've recently started stocking at work and is consequently going on everything I make, I love it! The hanging loops are of a beautiful printed cotton tape that is another obsession and I probably have enough to last me for decades! :)


Friday 8 November 2013

Fabric baubles!


Last year I visited a Christmas tree festival in a nearby town that I absolutely loved. One thing that stood out for me was a tree designed by a local quilting group that had the most wonderful baubles made up of overlapping triangles of fabric that made them look like pine cones I took a sneaky photo and resolved to try something similar myself but didn't have time last year, this year however I started early, I made these two back in October (or it may have even been September!)
 
They were easy to make, simply take a polystyrene ball and starting at the bottom overlap layer upon layer of folded fabric triangles, making sure the next layer hides the raw edges of the last, finished at the top with some Christmassy ribbon and a bow! They look lovely on the tree and are a great way of using up those teeny tiny scraps of Christmas fabric that I just can't bear to throw away!

Thursday 7 November 2013

Pink table DIY

 
Remember this blue table? Well I couldn't resist buying the next size up too and painting this one pink. I love painted furniture! I felt like we needed some more mood lighting in the lounge and of course a table lamp needs a table to sit on. I saw a gorgeous map lamp on pinterest and knew it would be perfect for our map themed room. I'd been hunting around for a traditional shaped wooden lamp base with the idea of painting it (green perhaps?) when my lovely fiancĂ© pointed this one out. At first I thought absolutely not (too manly) but I grew more fond of the idea and now am so glad it's the one we picked, the masculinity of the stand contrasts wonderfully with the pink table!
 
I tore the original pleated fabric from around the lampshade that came with the base and used double sided sticky tape to attach map wrapping paper. I felt it needed something to finish off the edges though and this velvet ribbon was just the thing. I'm so happy with how it turned out, I love it when something is as good in real life as when you imagine it your head (not always the case in my experience!!)

Friday 1 November 2013

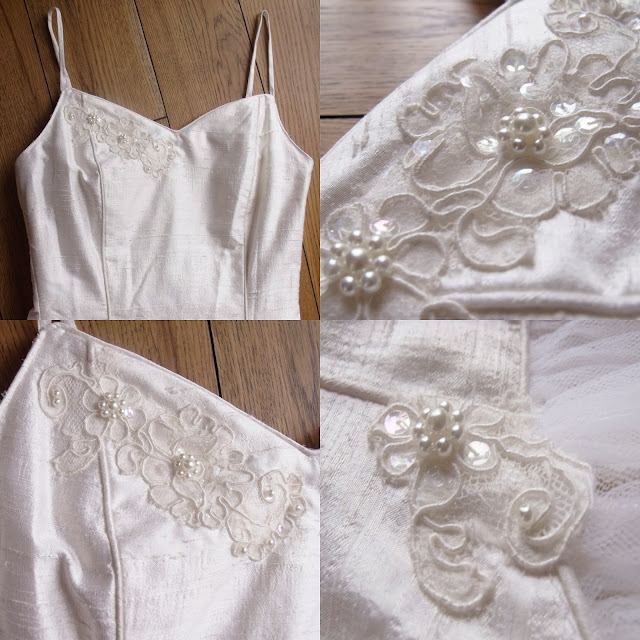
Wedding dress restyle


I love this dress, it had a beautiful tulle overlay skirt and a gorgeous silk bodice. All it took was to replace the puff sleeves with delicate straps and to add a little lace and sparkle and it would be stunning on any bride. I really enjoy doing make overs like this, I like exploring the potential in even the most dubious dresses!


Cosy knitted slippers

I'd like to first say that although I have knitted a few things in the past they have all been some form of square or rectangle in the most basic stitch. Knitting patterns have always been completely beyond me with all their abbreviations and complicated instructions, it's like a completely different language that I definitely do not speak! However, I saw this slipper pattern and knew it was time to get over my fear. I was assured that it was a super simple pattern that I would have no trouble with however I was still sceptical.


But as you can see I proved myself wrong! Line one of the pattern was simple, but I came unstuck already on line two with 'Knit into front and back of stitch' what is that? Luckily Google came to my aid and I found a great photo tutorial which made it simple as can be! They took only a couple of hours each over a weekend and I love them. Although they fitted perfectly they felt like they were about to fall off at all times so I stitched in the ribbon which sorted that problem and looked lovely to boot! :) I'm now feeling inspired by my success to try another (easy peasy) knitting pattern! :)